I love the idea of strip dresses. They are too fun! I started there, but there were still small pieces that just weren't big enough to get a strip out of. So then I decided to make a patchwork dress! I've fiddled with the pattern for some time now - how big should the squares be? how many fabrics should be used? how many squares should I cut? how many squares in how many rows?
In this quick tutorial, I'm not going to answer all those questions for you. The truth is - I'm still ironing some of those details out and, really, the dresses and skirts turn out adorable each time I tweak the # and size of squares. I'm providing you with a basic framework of sorts to creating a patchwork piece of your own! You can figure out the smaller details and tweak and play with your fabric until you get that "just-right" combination for you. I am also not including bodice details. I have used many different bodices and waistbands when creating my patchwork pieces. Choose your favorite style and go from there! You will need to have your bodice (or waistband) already completed before moving on to step #8 in this tutorial.
 1. You need to choose your fabrics. You can choose any number of prints and solids, depending on how many squares you will need and how often you want those blocks to show up in the finished piece. For this particular dress, I chose 7 prints. Cut your fabric into the size square you will be using. I suggest blocks between 1 and 3 inches. Anything smaller will be difficult to work with and anything larger will be to big for Barbie sized dolls.
2. Lay your squares out in rows and determine what order you want the prints in and how many you want in each row. Once you have your order decided, stack the fabric in that order, keeping separate stacks for the top, middle, and bottom rows. NOTE: You can do more than three rows, of course, or less, depending on the size of the square and how long or short you want your dress to be. I typically use three rows.
3. Sew your blocks together. I use a conventional machine, so I don't serge my seams, but it is your choice.
4. Once all blocks are sewn together, you should have three separate rows (see my note on step 2.)
5. Press open your seams. This gives your rows a much cleaner look and opens out your blocks to their fullest. It also keeps puckers from happening and makes sewing rows together much easier!
6. Press and stitch your lower edge hem. I typically use between a 1/4 and 1/2 inch hem.
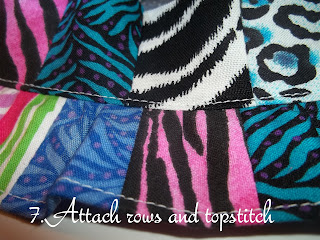
7. Gather the upper edge of your bottom row. Pin to the lower edge of your second row. adjust gathers to fit. Stitch. Press seam up and top-stitch. If your rows have the same number of squares in them, there is no need to gather. Simply stitch the two rows together and press the seam up, then top-stitch. Repeat this step to add each additional row.
8. Once you have all your rows sewn together, gather the upper edge of your patchwork skirt. Pin skirt to bodice (or waistband). Adjust gathers, stitch. Press seam up and top-stitch. Stitch center back seam from lower edge to top of the second row. Finish back edge with either Velcro or snaps.
All-in-all, it's a fairly simple process to create a look that is unique every time you do it! Email any questions you have to barbieboutiquebasics@hotmail.com


No comments:
Post a Comment